
This step-by-step guide covers everything you need from pre-configuration settings to configuring accounts before going live.
Note: Platform setup is crucial for platform performance and client satisfaction. We are advised that you’ve already gained full knowledge of key trading terms and processes, then follow this guide closely. Incorrect settings can cause trade disruptions or potential client issues. For any questions, contact your technical support representative at first.
Pre-configuration Planning:
Before putting into operation, you should define your offering terms:
- Spreads
- Swaps
- Commissions
- Leverage & Margin
These inputs are essential for segmenting your trading environment into ‘Domains’ based on two principles:
- Domain-level configuration → spread and swap
- Account-level configuration → leverage, commission, margin call
🧭 Setup Workflow
- Add Liquidity Provider (LP) quote
- Create a Domain (e.g., Standard, ECN, STP, Demo)
- Assign quote source to domain
- Configure swap schedules for each domain
- Set spread for each domain
- Create trading accounts
- Set account leverage and margin
- Define commission rules
- Deposit/Withdraw funds
Add Liquidity Provider (LP) Quote
(1) Click Liquidity → Source LP Subscription → Liquidity Provider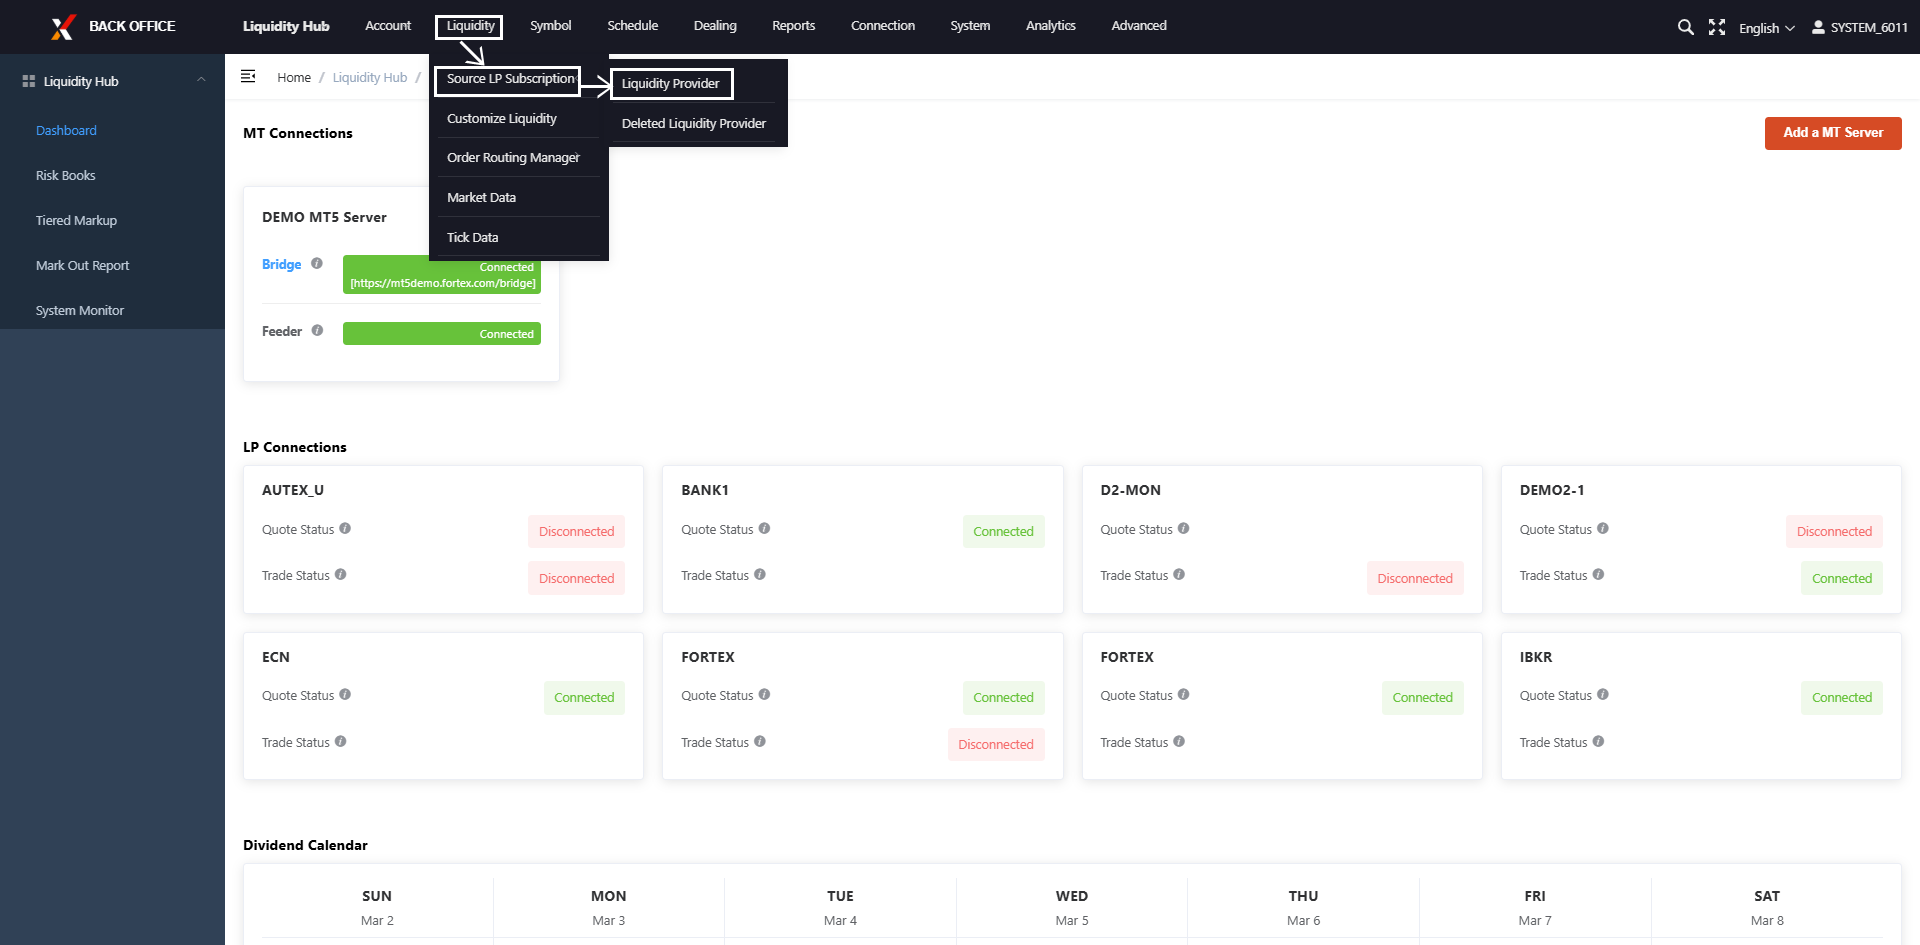
(2) Click Add New Quote LP or Add New Trade LP button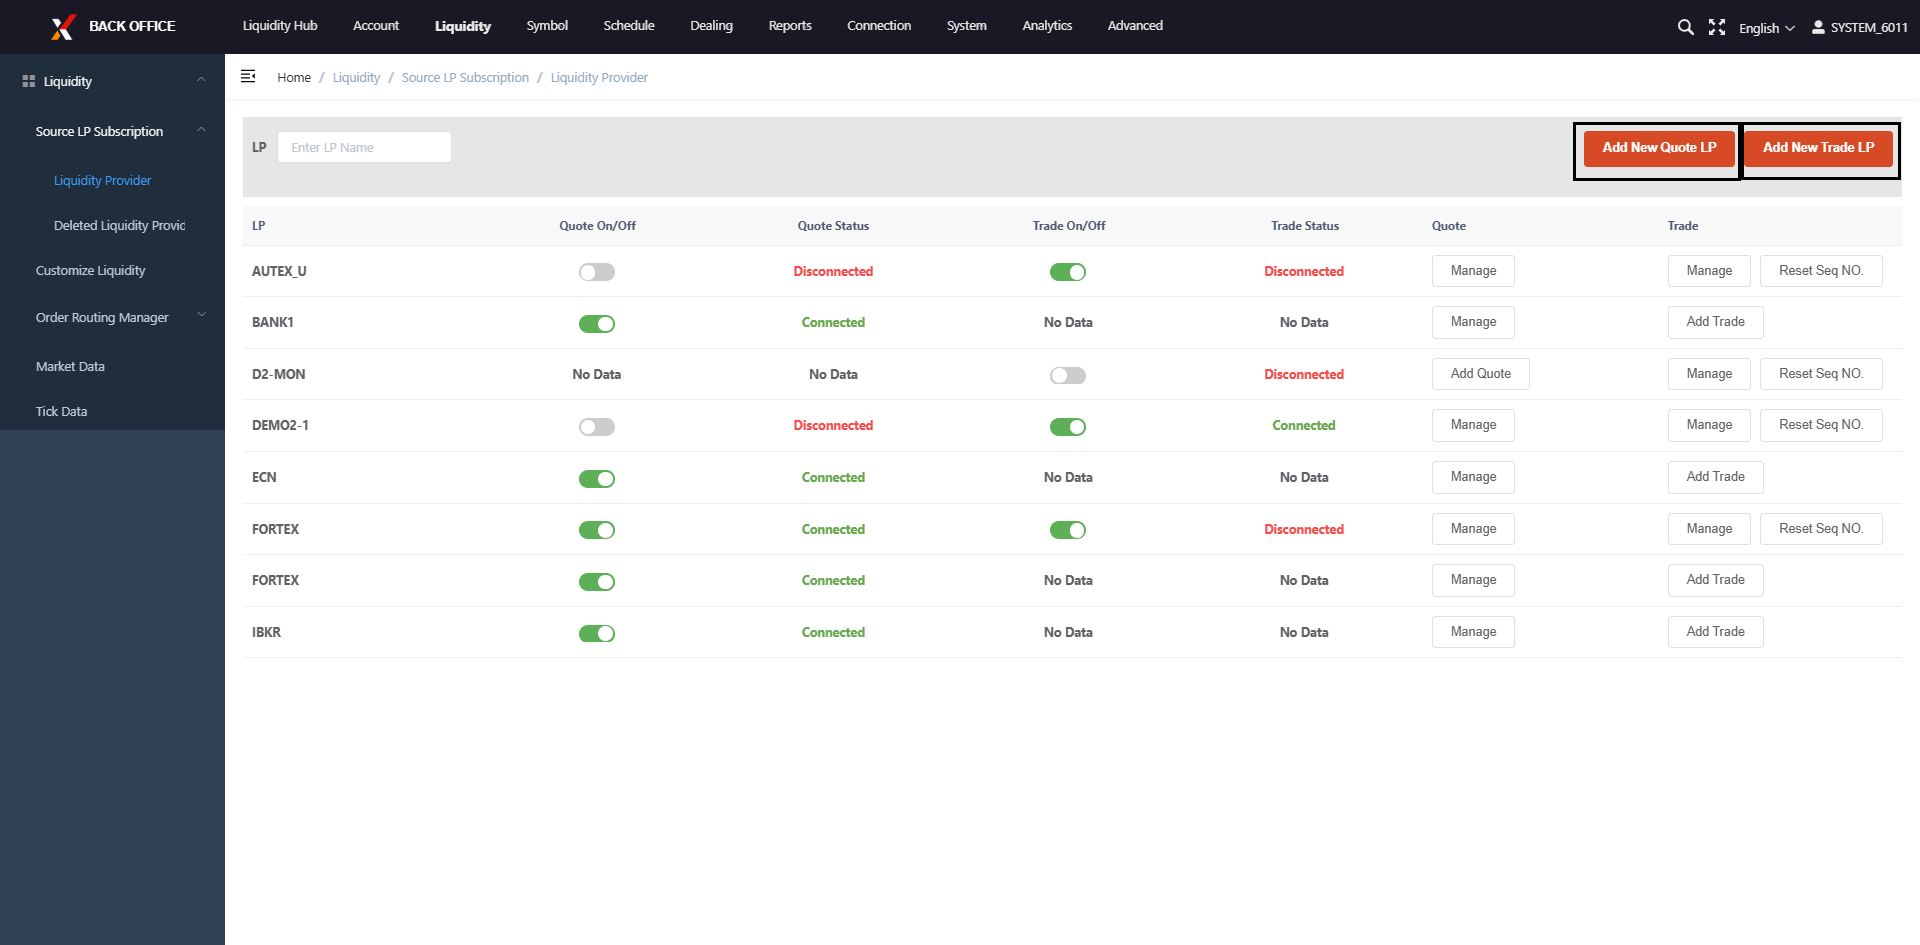
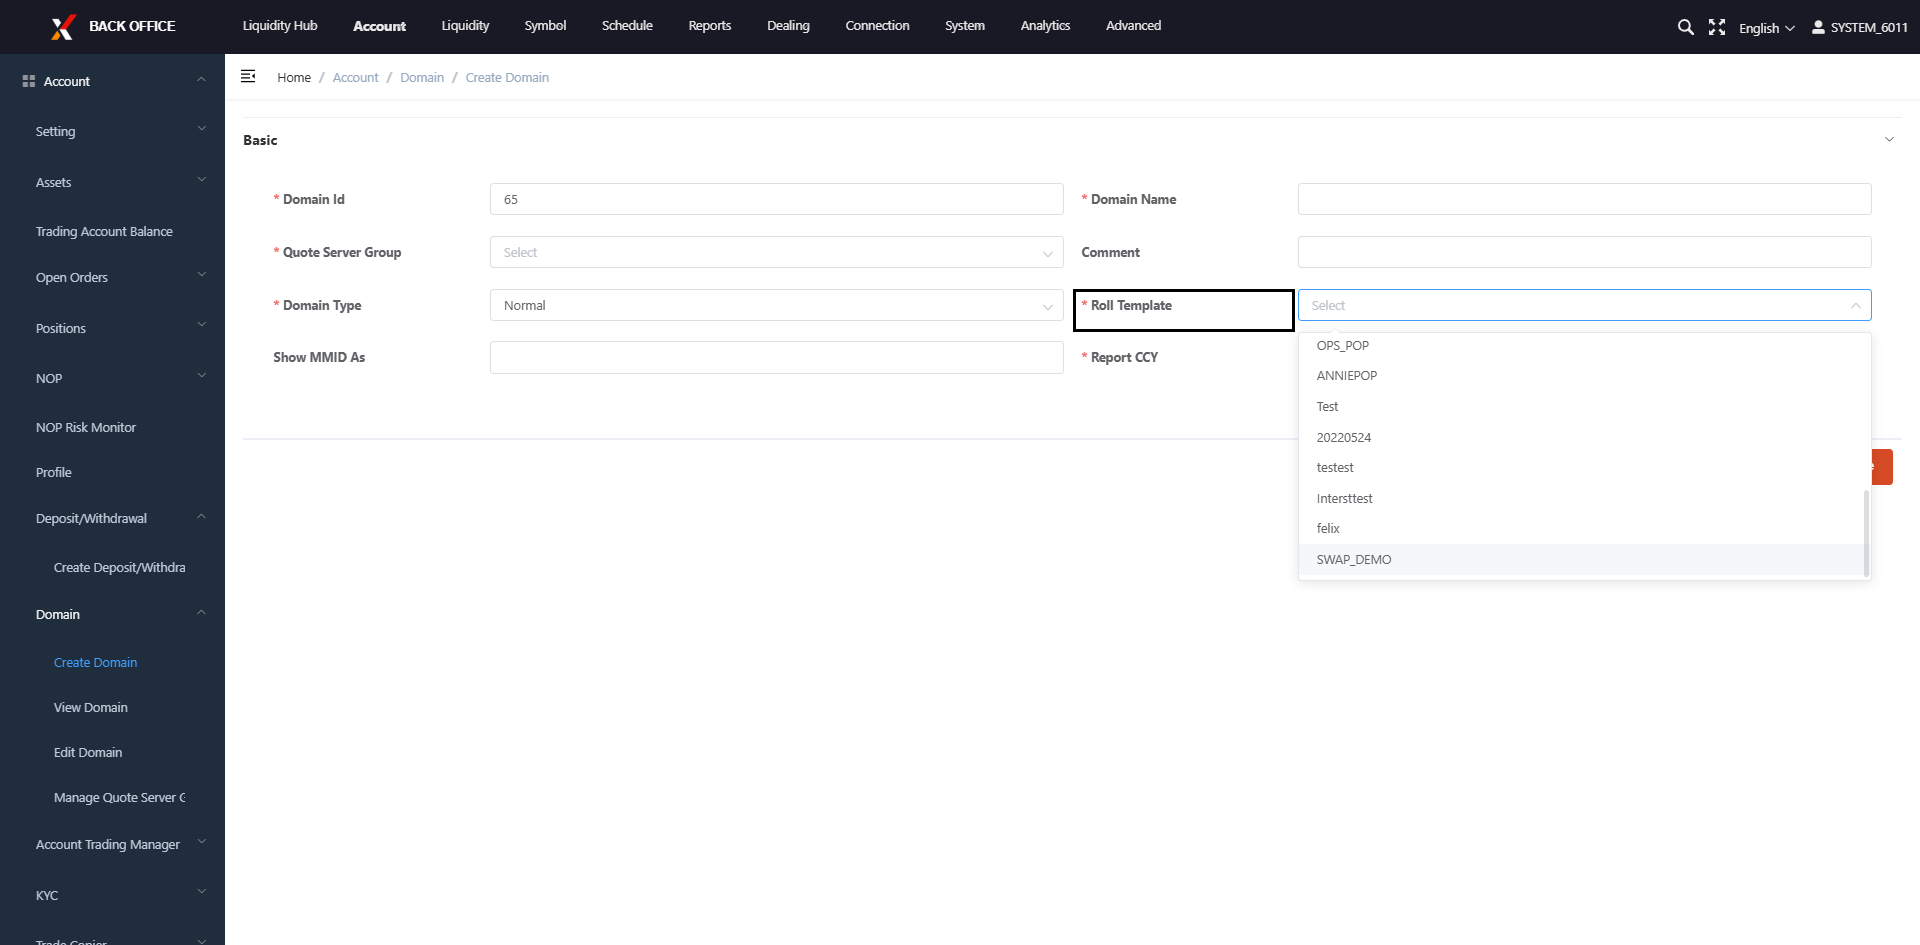
Create a Domain (e.g., Standard, STP, ECN or Demo domain)
(1) Click Account → Domain → Create Domain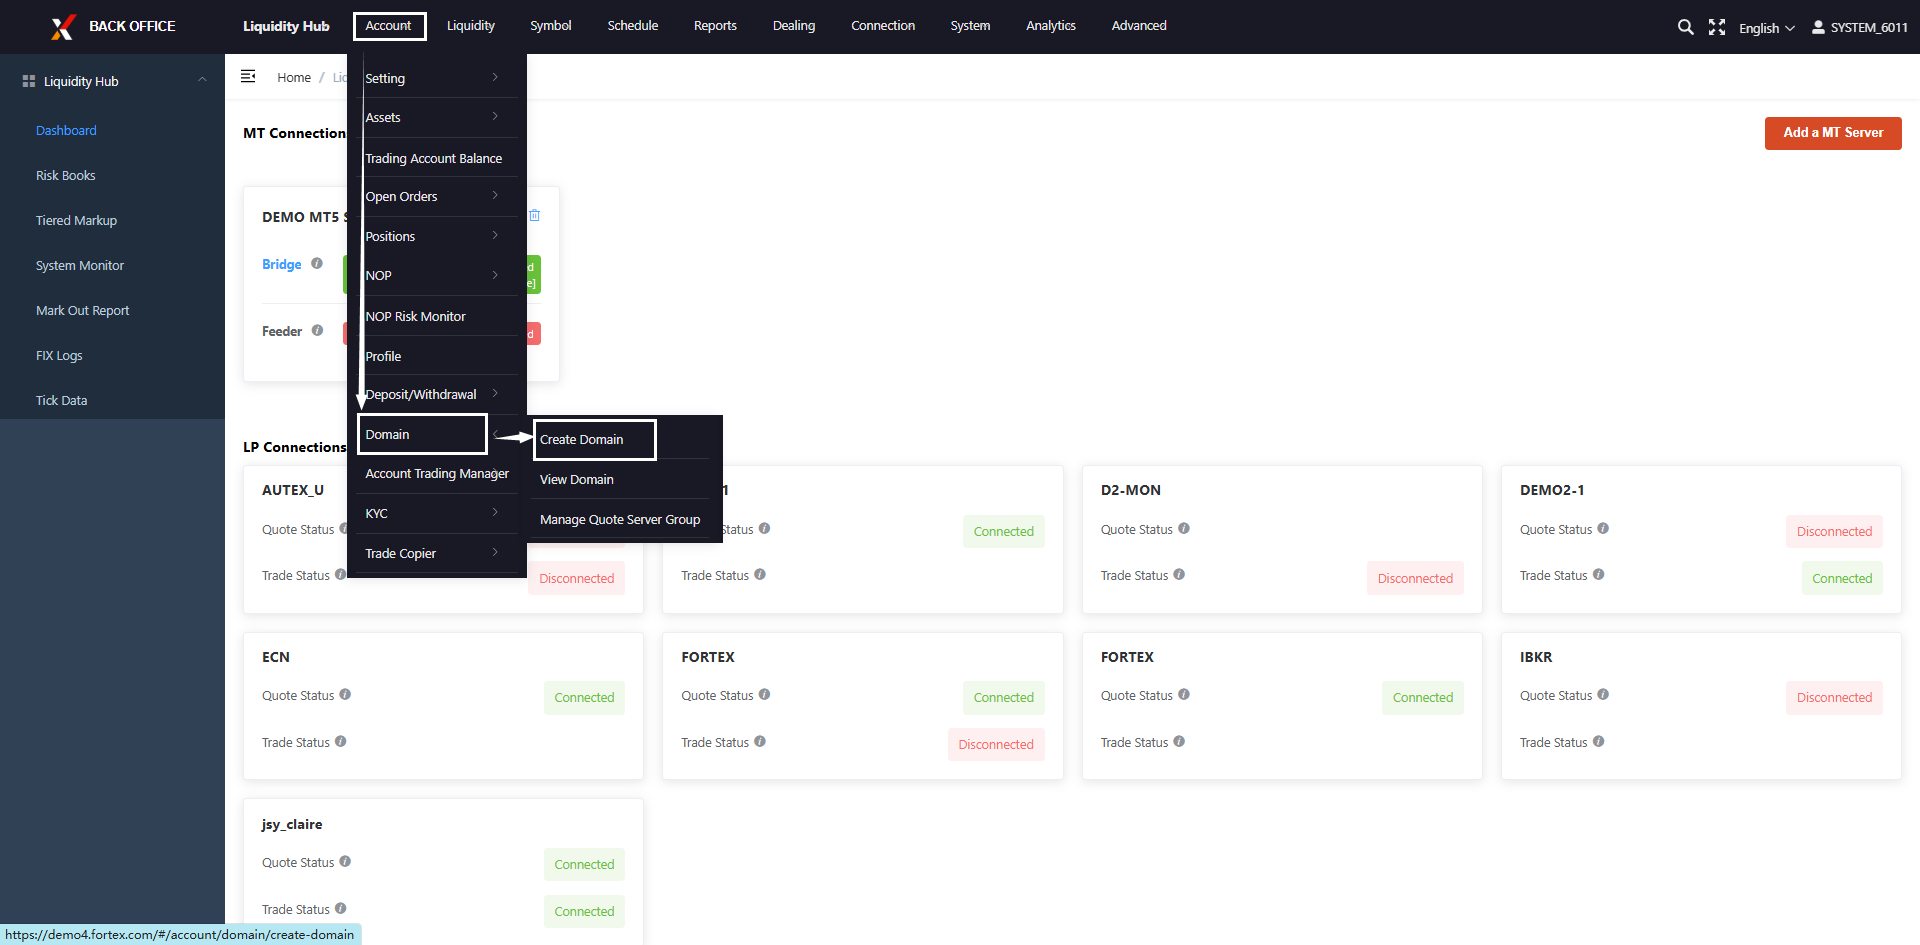
(2) Fill up the Domain form and specify the domain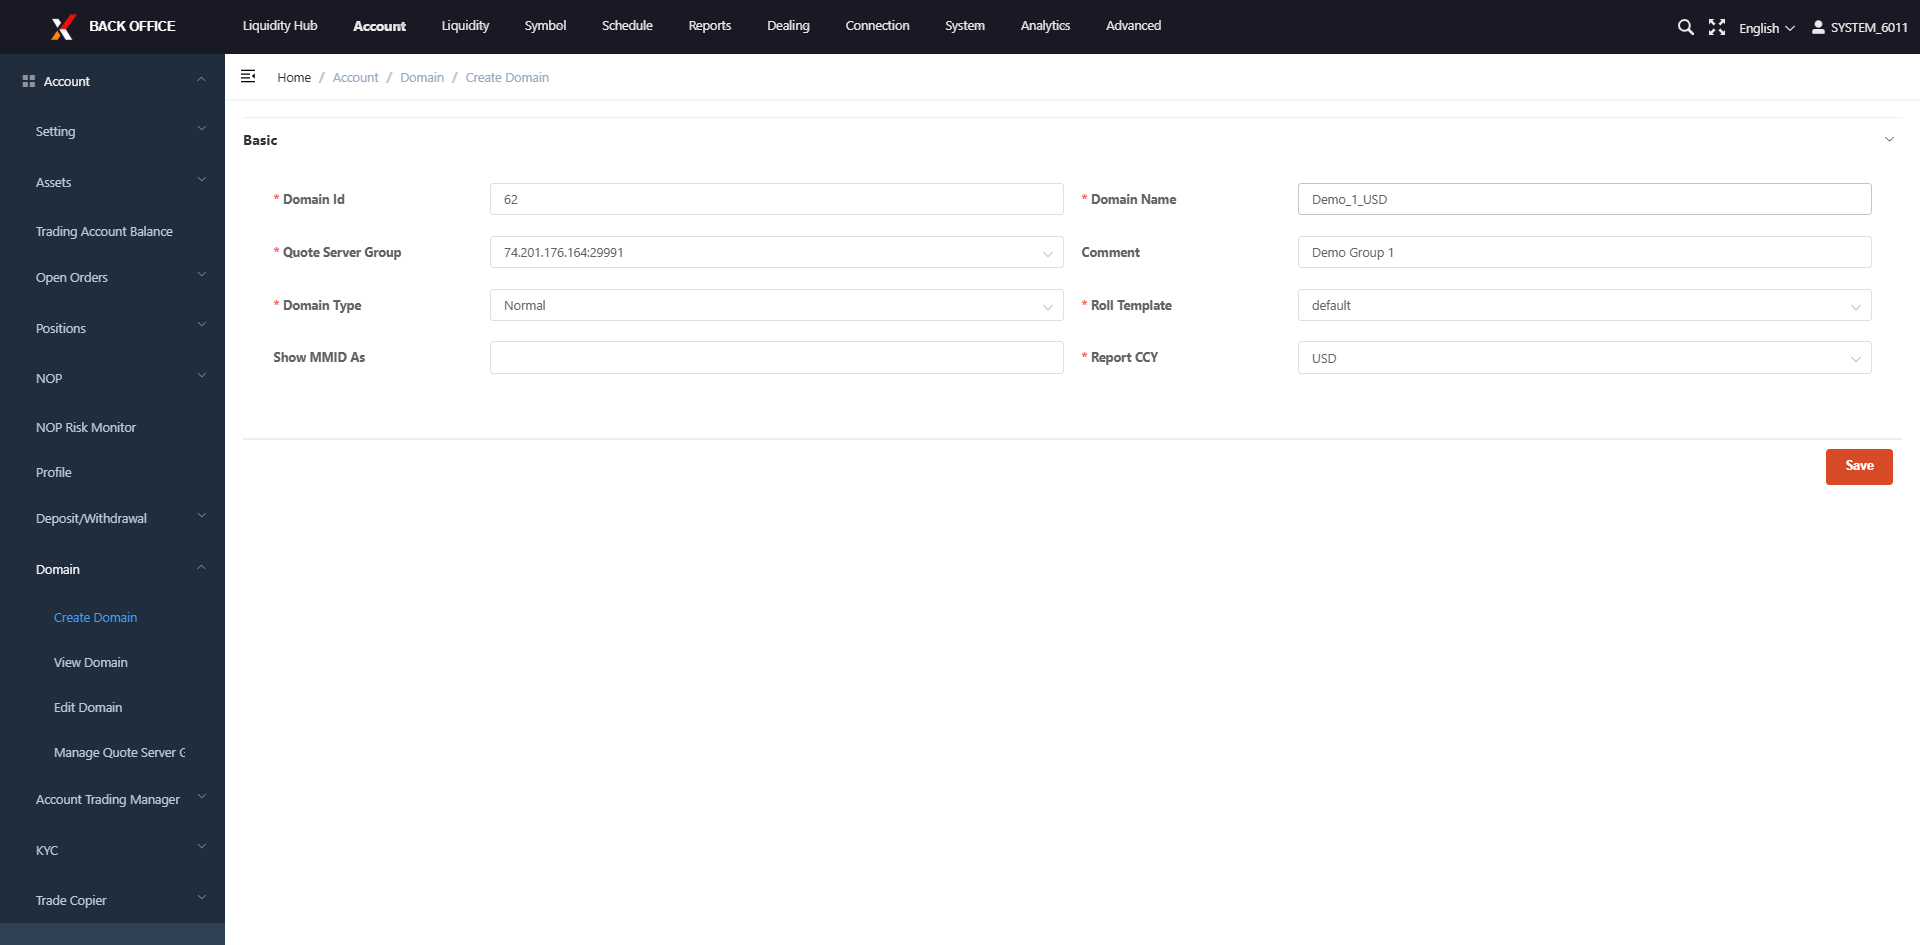
Assign Quote Source to Domain
(1)Click Liquidity → Customize Liquidity → Add New Price Group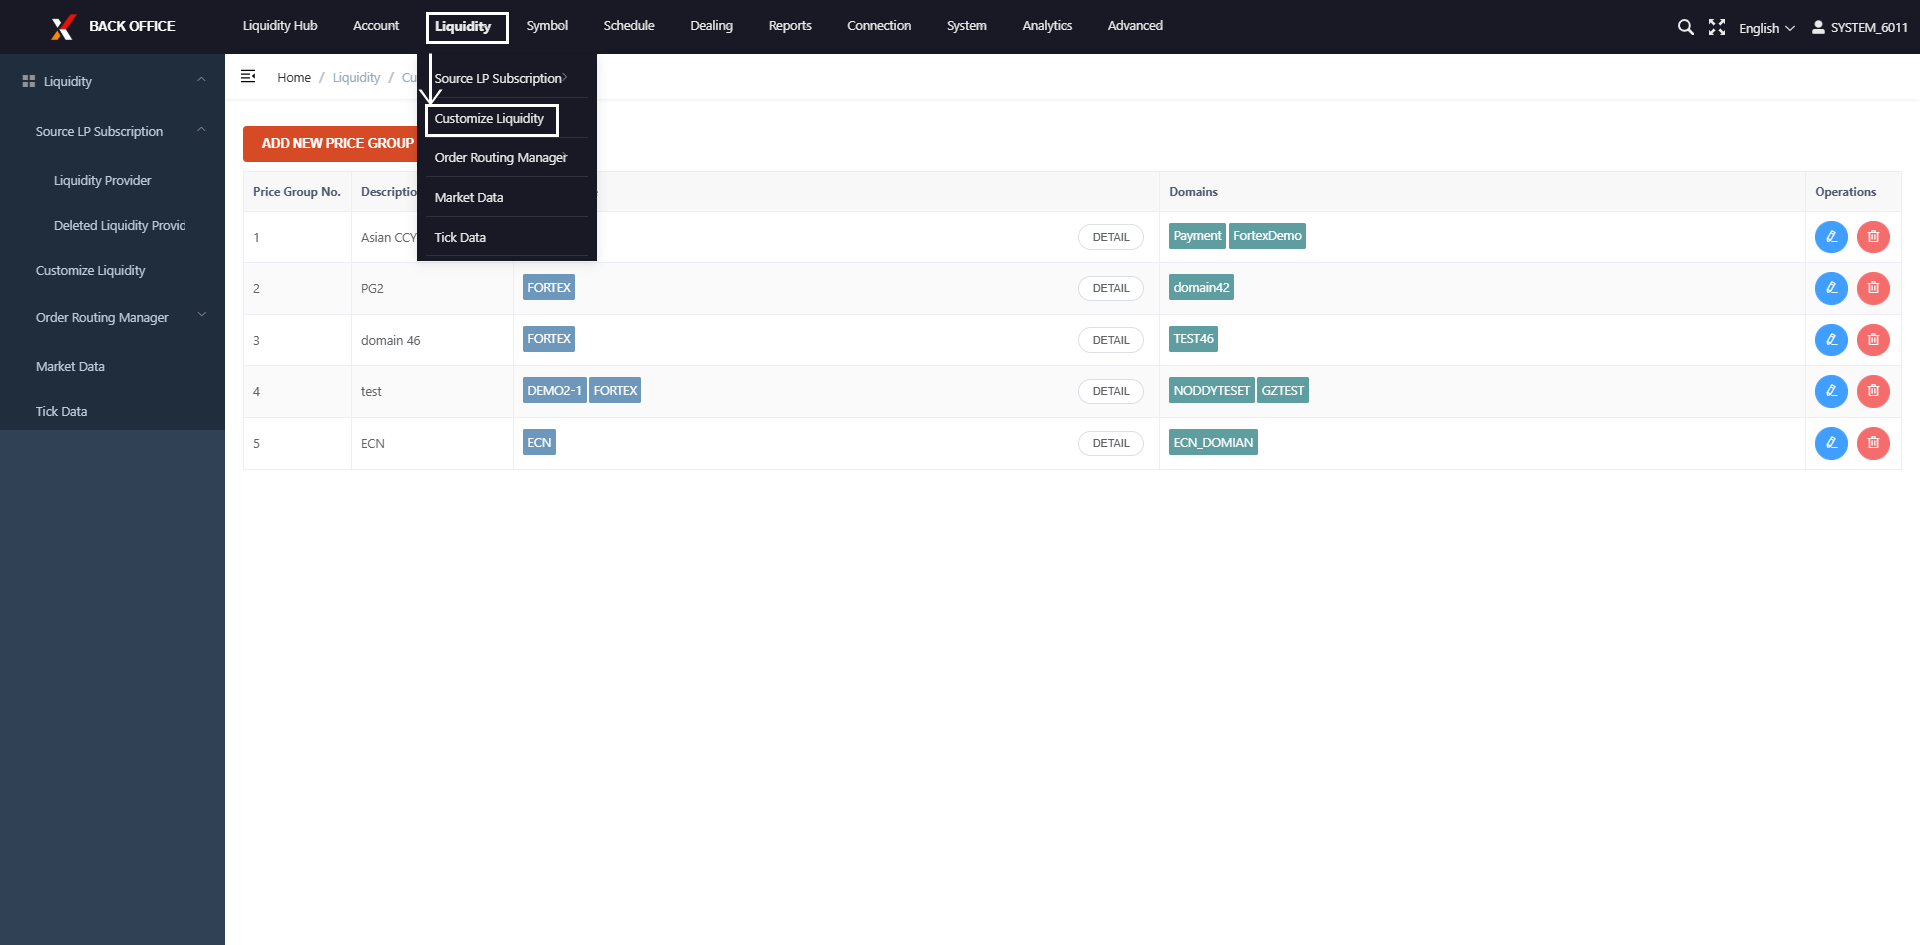
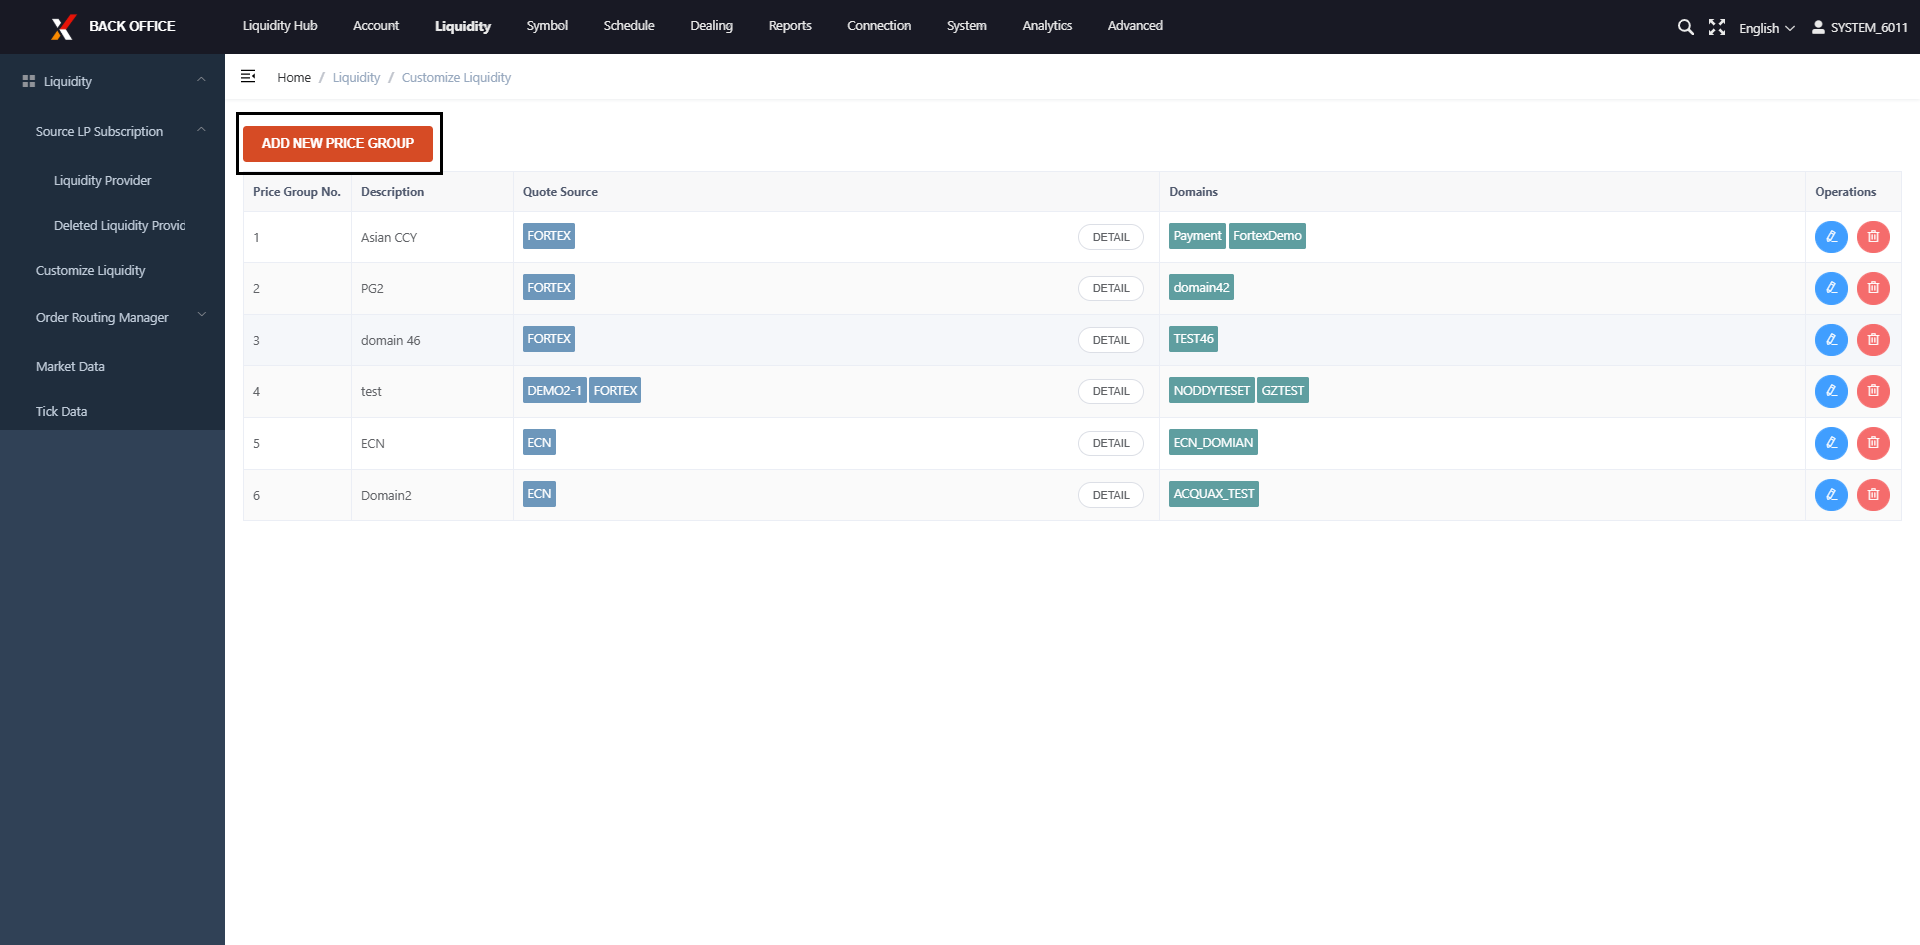
(2)Fill out the information on Price Group, Quote Source and Domain in the Add New Price Group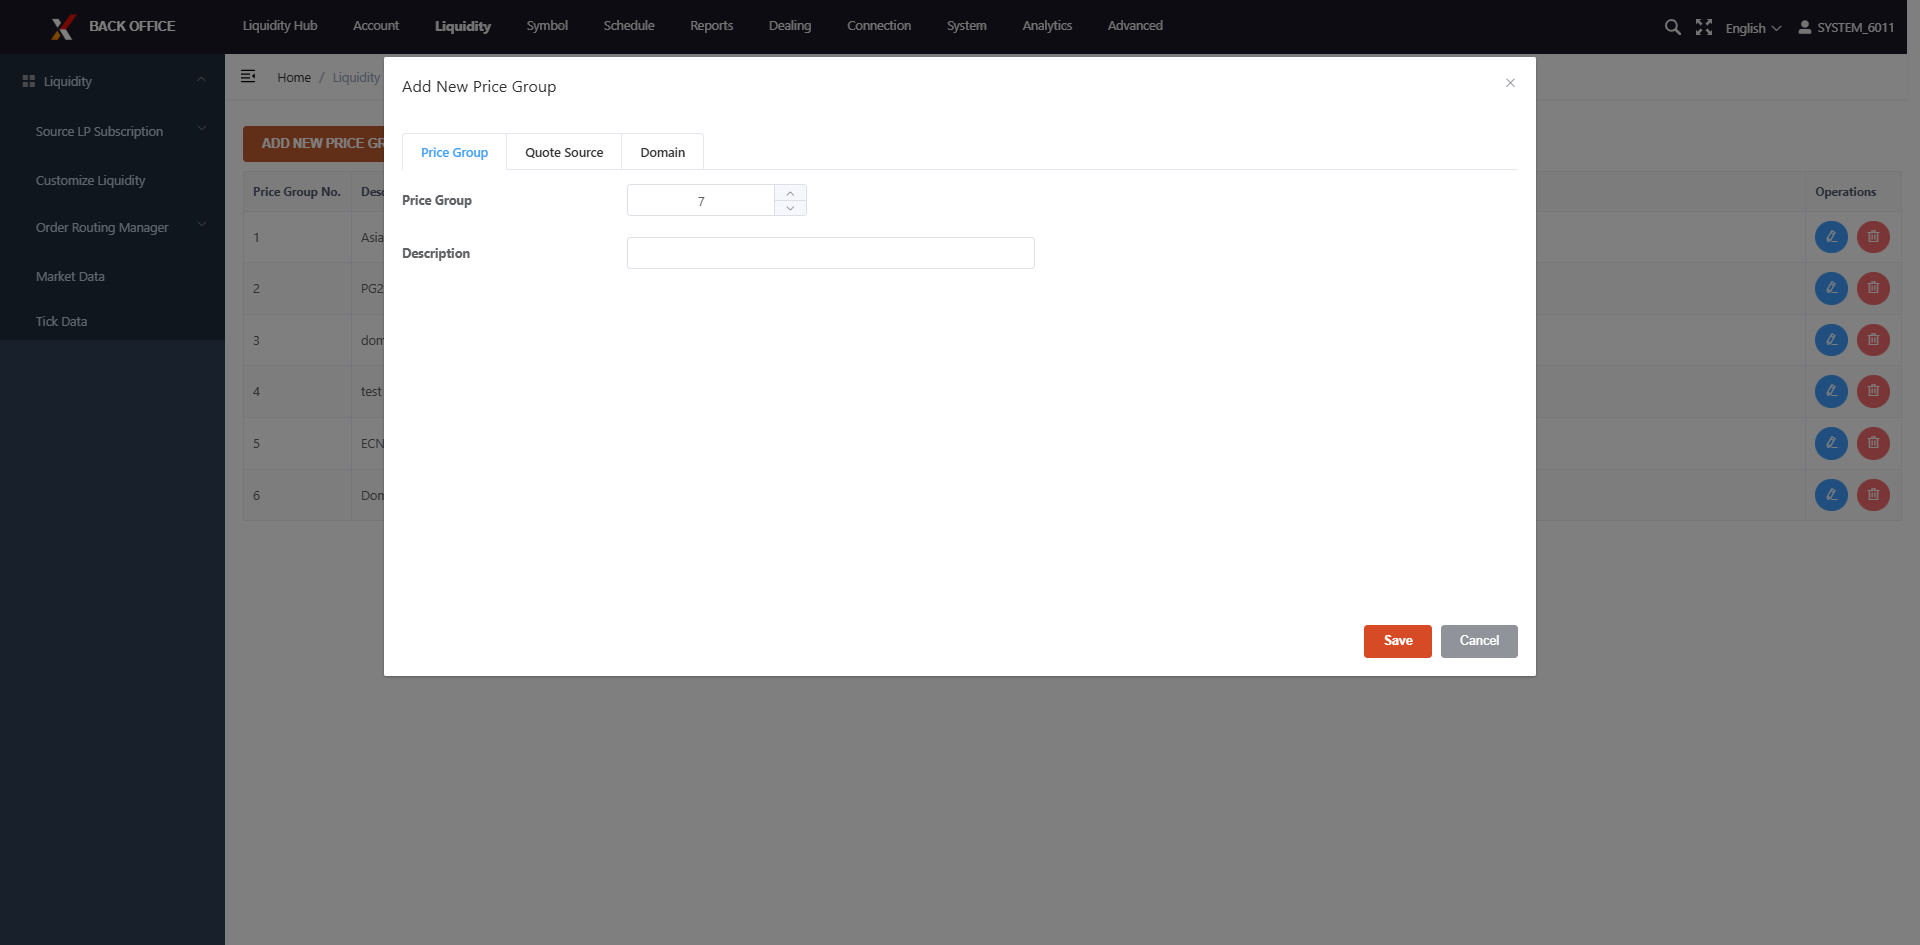
Configure Swap Schedules for Each Domain
For symbols that charge swaps on Wednesdays, Thursdays, or Fridays, you can set them here
(1)Click Schedule → Swap Schedule → Create Swap Schedule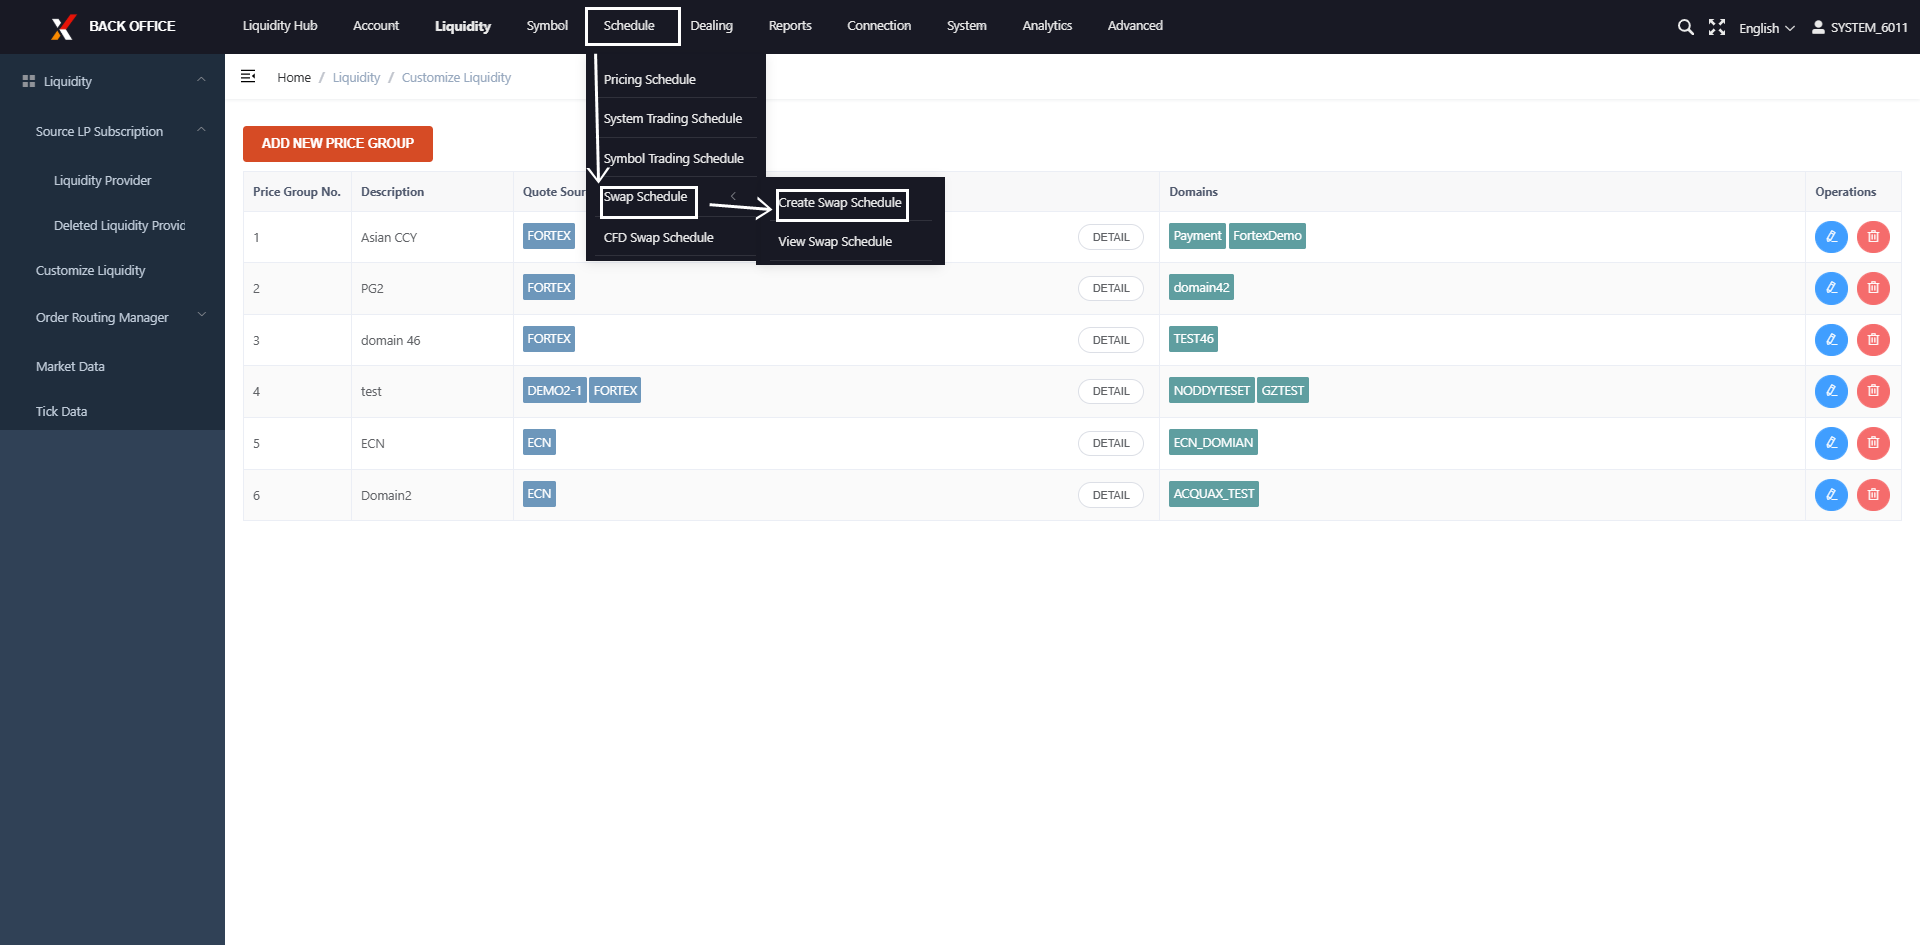
(2) Click to download Swap Schedule Template, and then fill out the swap schedule and values, click Select File, and finally click Upload button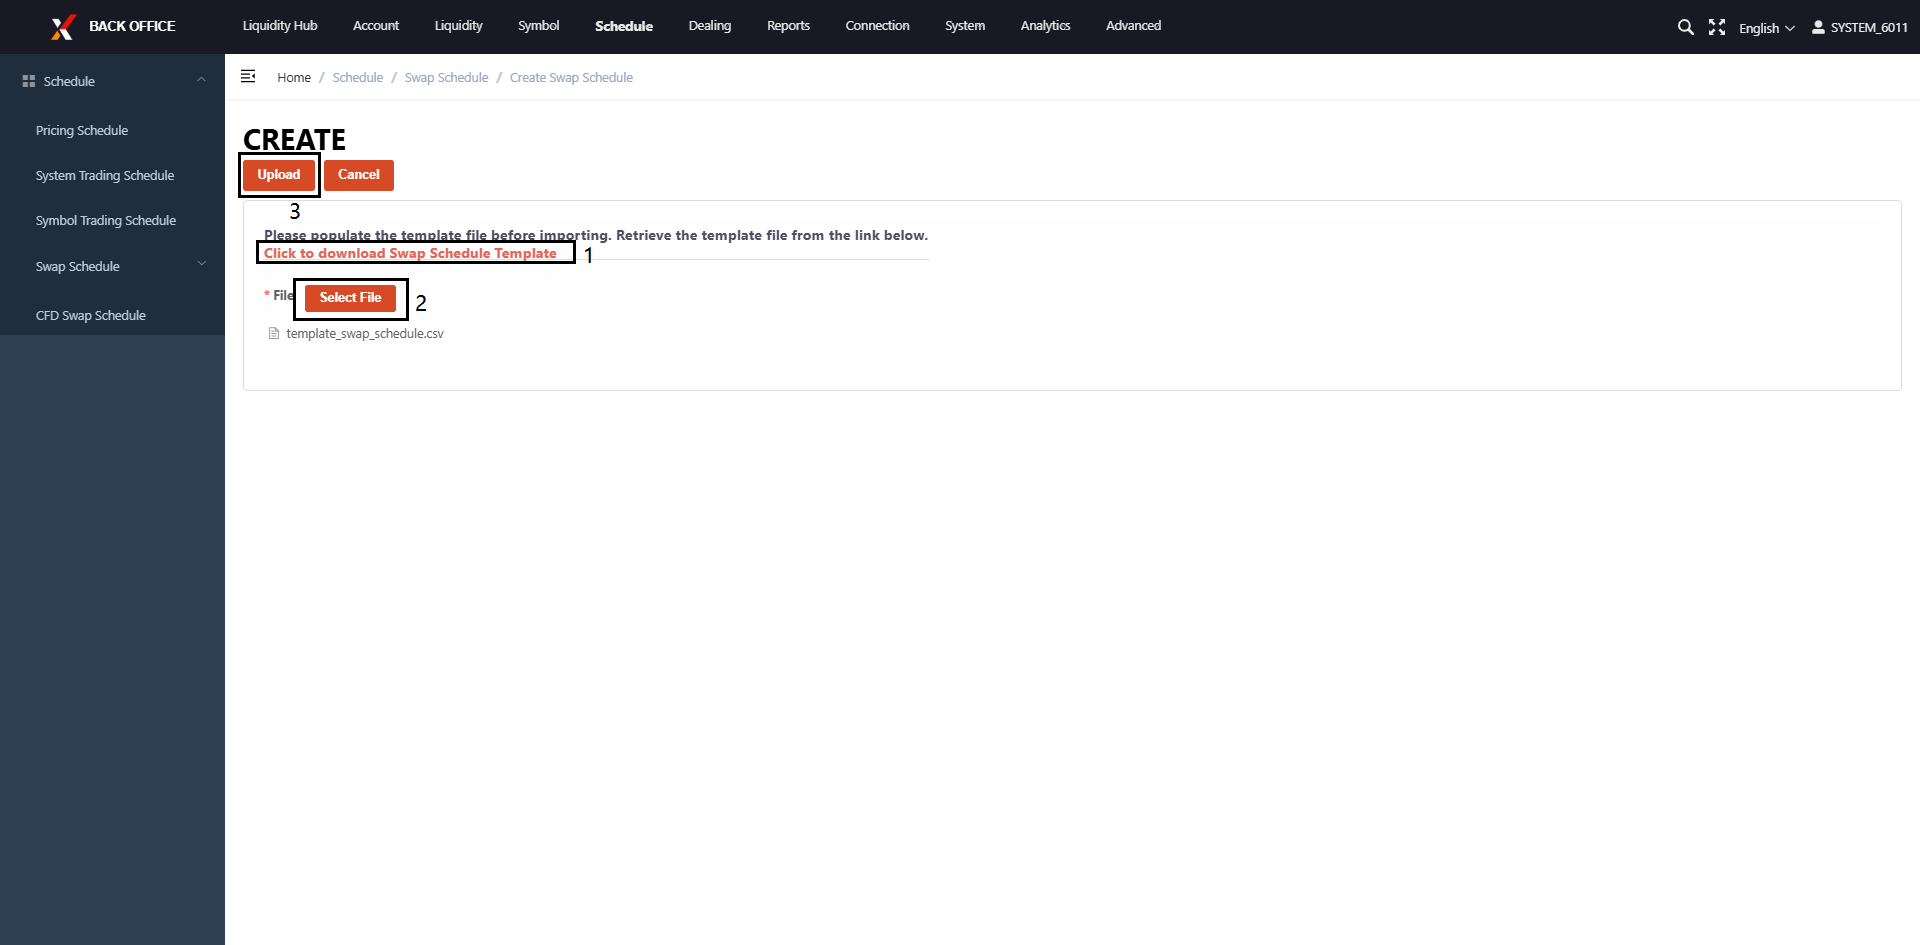
(3) Import a template and apply it to a specific Domain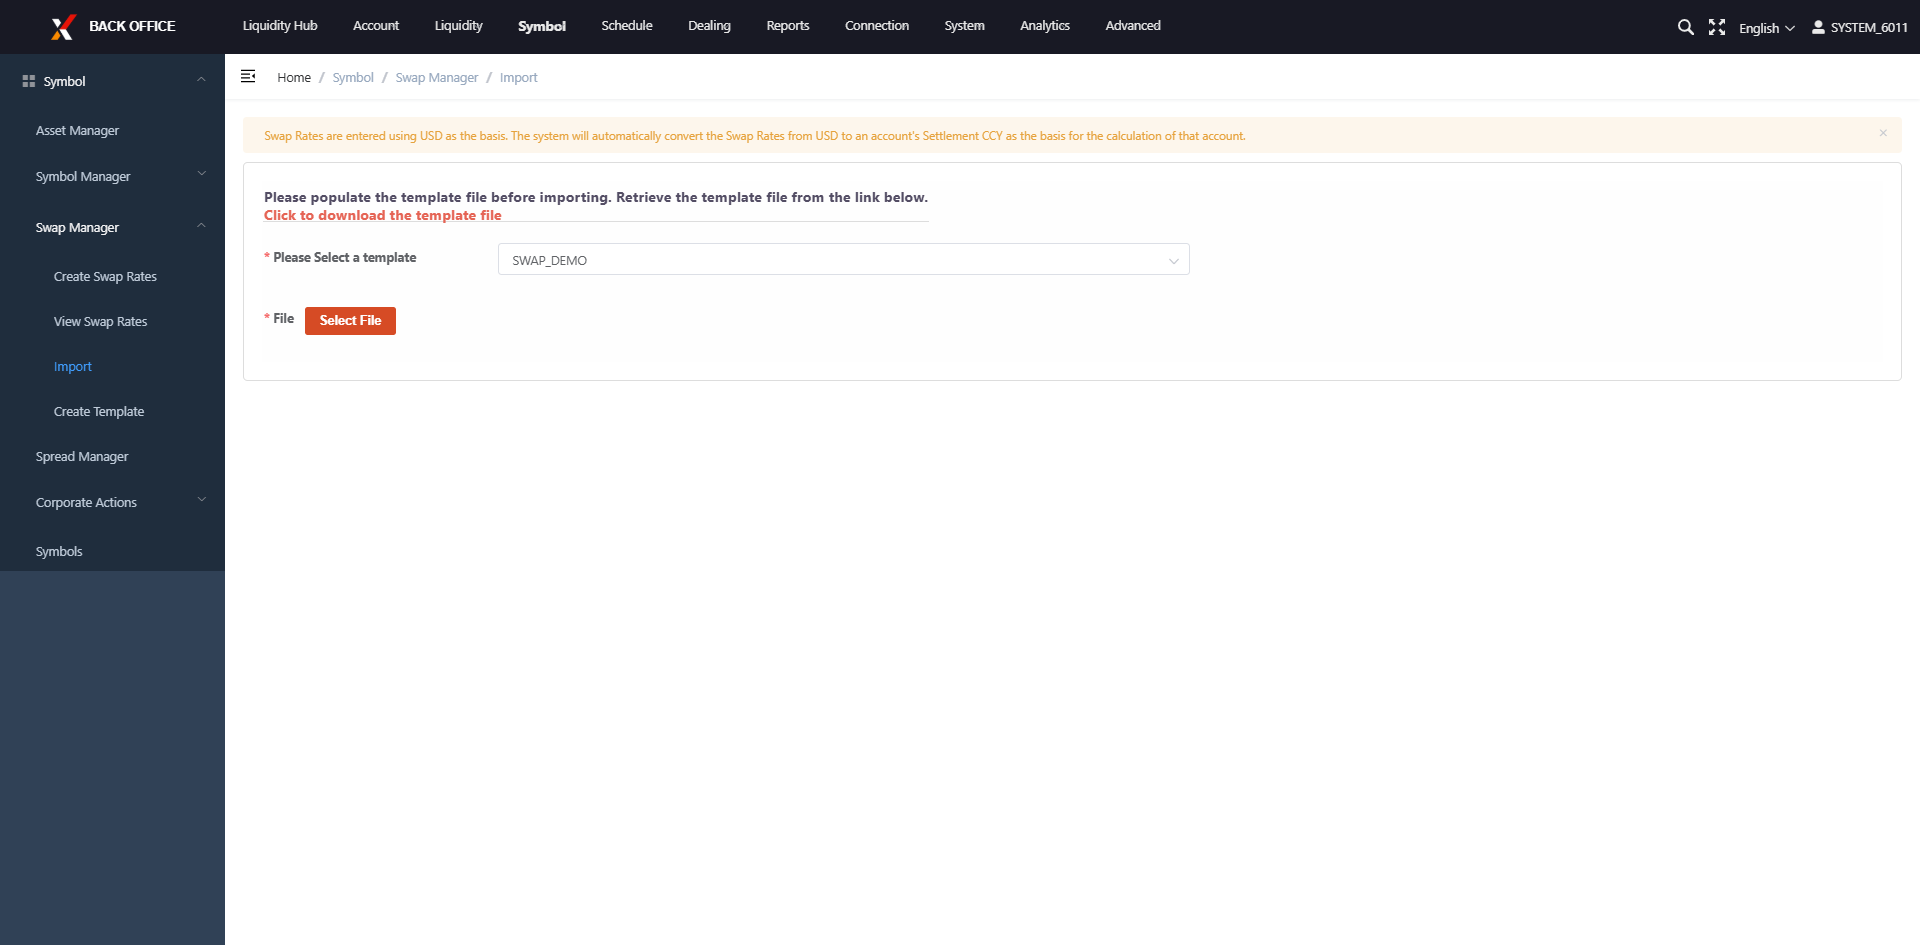
Set Spread for Each Domain
You can setup spread for each domain and symbol
1)Click Symbol → Spread Manager
(2)Click one symbol and input the value to adjust the spread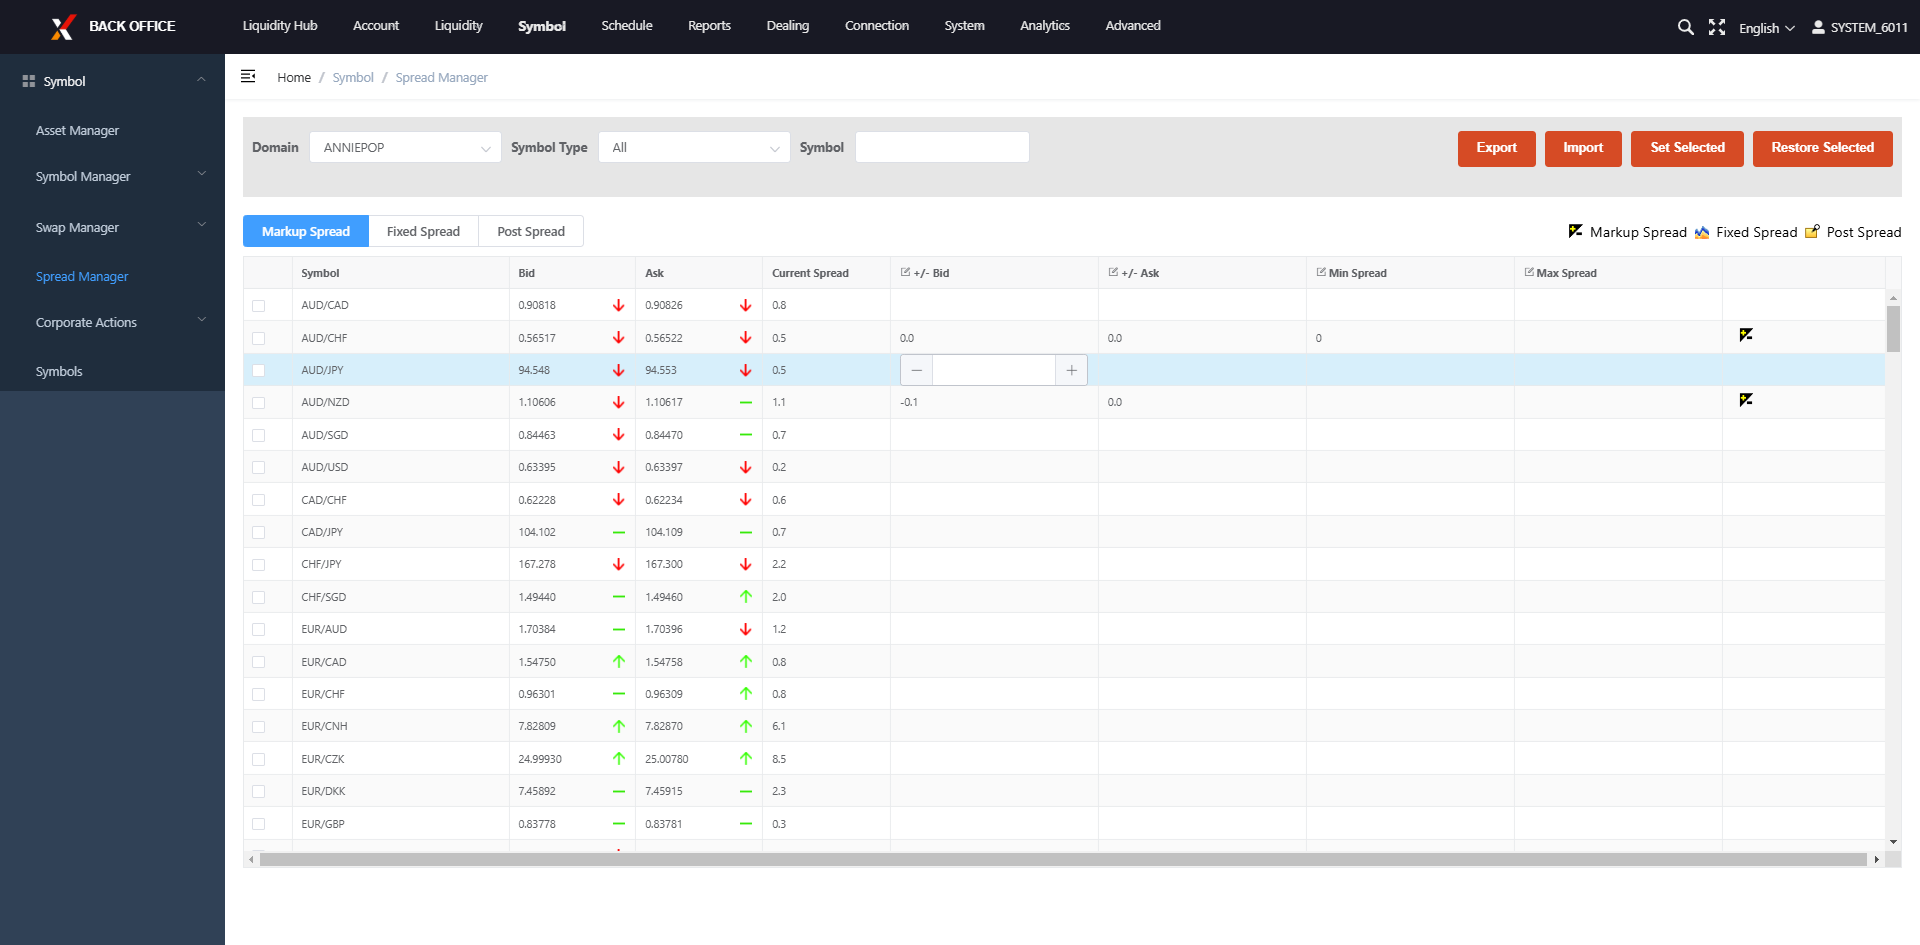
Create Trading Accounts
(1)Click Account → Setting → Create Account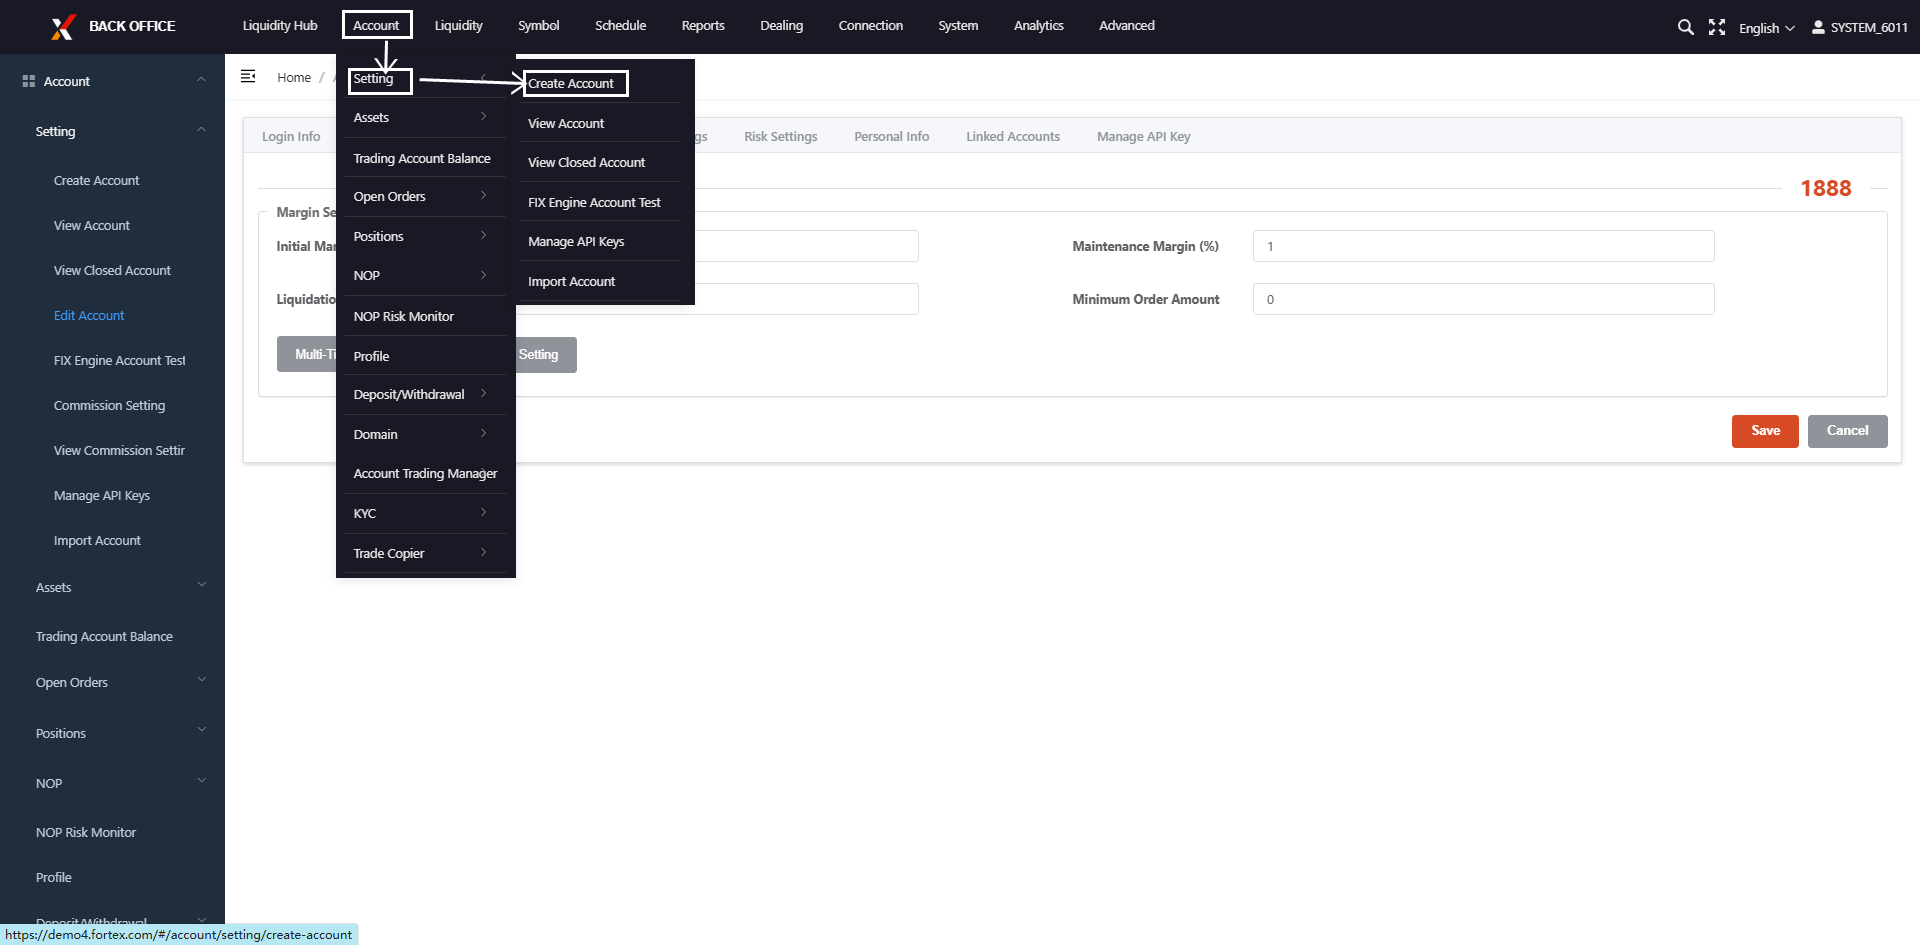
(2)Fill out the information in Account Profile and click Save button at the very bottom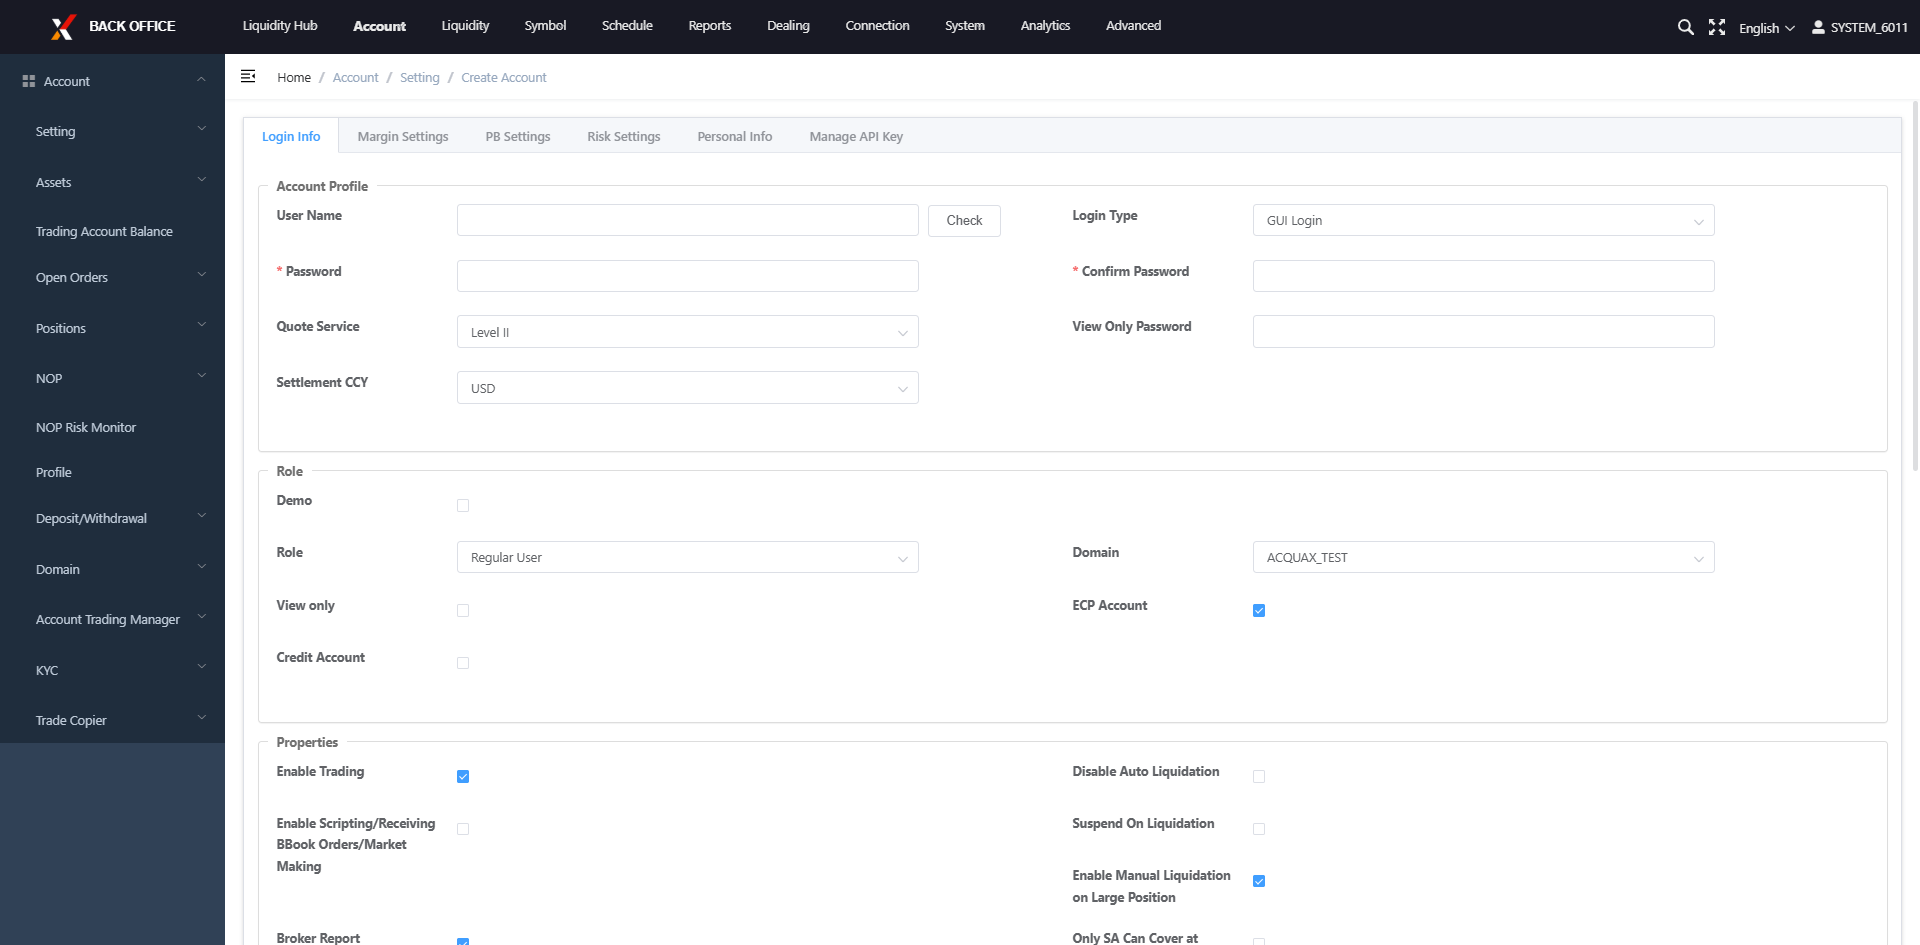
For detailed demo and live account creation steps, click here
Set Account Leverage and Margin
Click Margin Setting, fill out the Required Margin, Liquidation Margin and Maintenance Margin, and finally click Save button.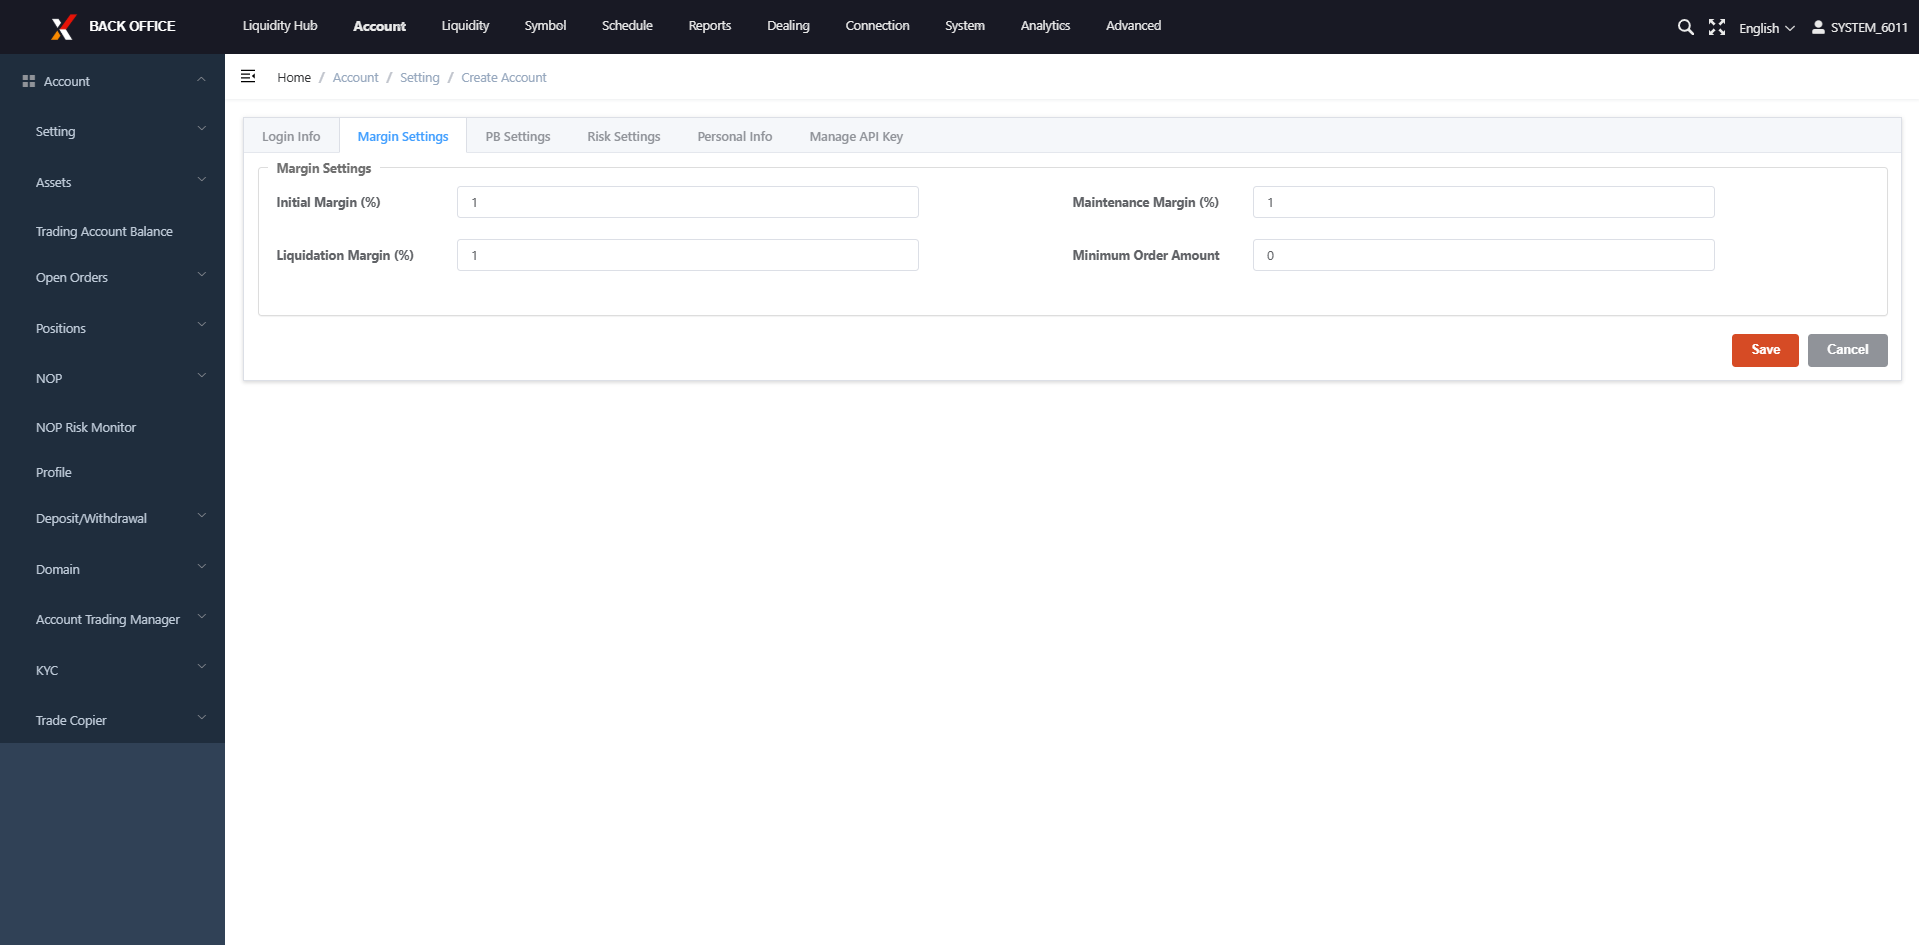
For how to calculate the leverage and relevant examples, please click here.
Define Trading Commission Rules
Click Commission Settings, fill or edit the values, then click Save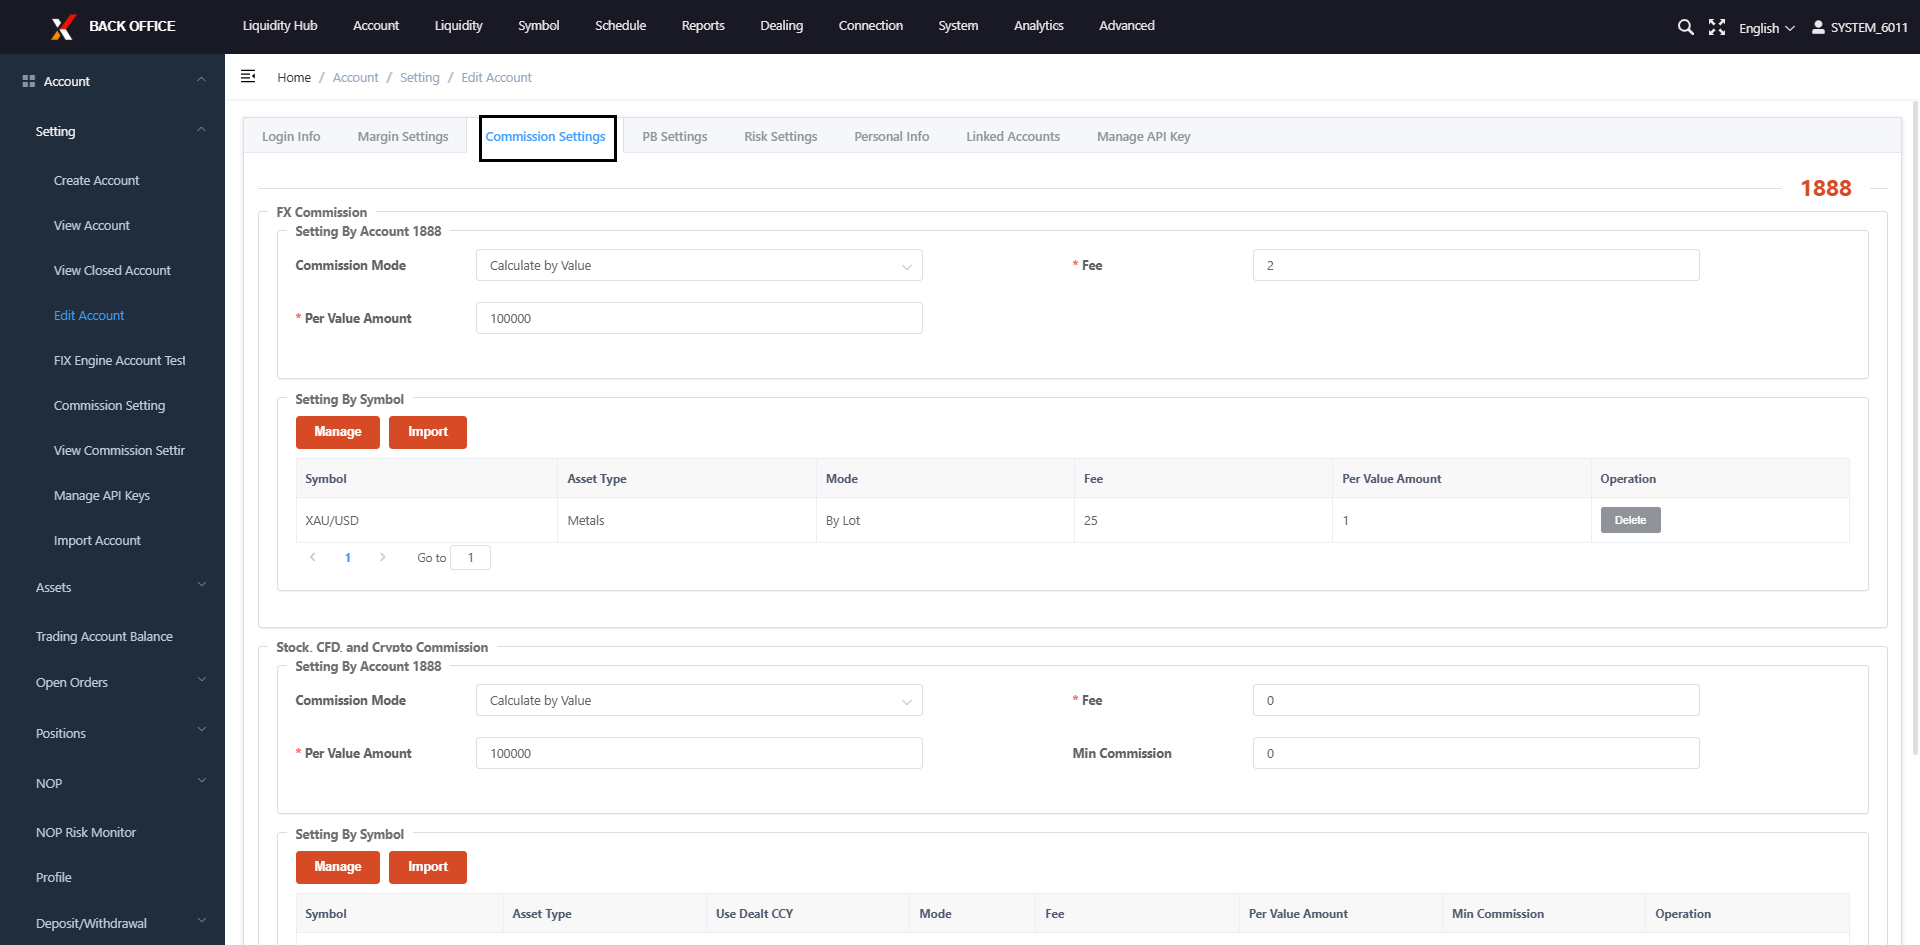
Commissions can be charged by lot, by value, or a combination of both. Customization per symbol is supported. For more information, please click here.
Deposit/Withdraw Funds
(1) Click Account → Deposit/Withdrawal → Create Deposit/Withdrawal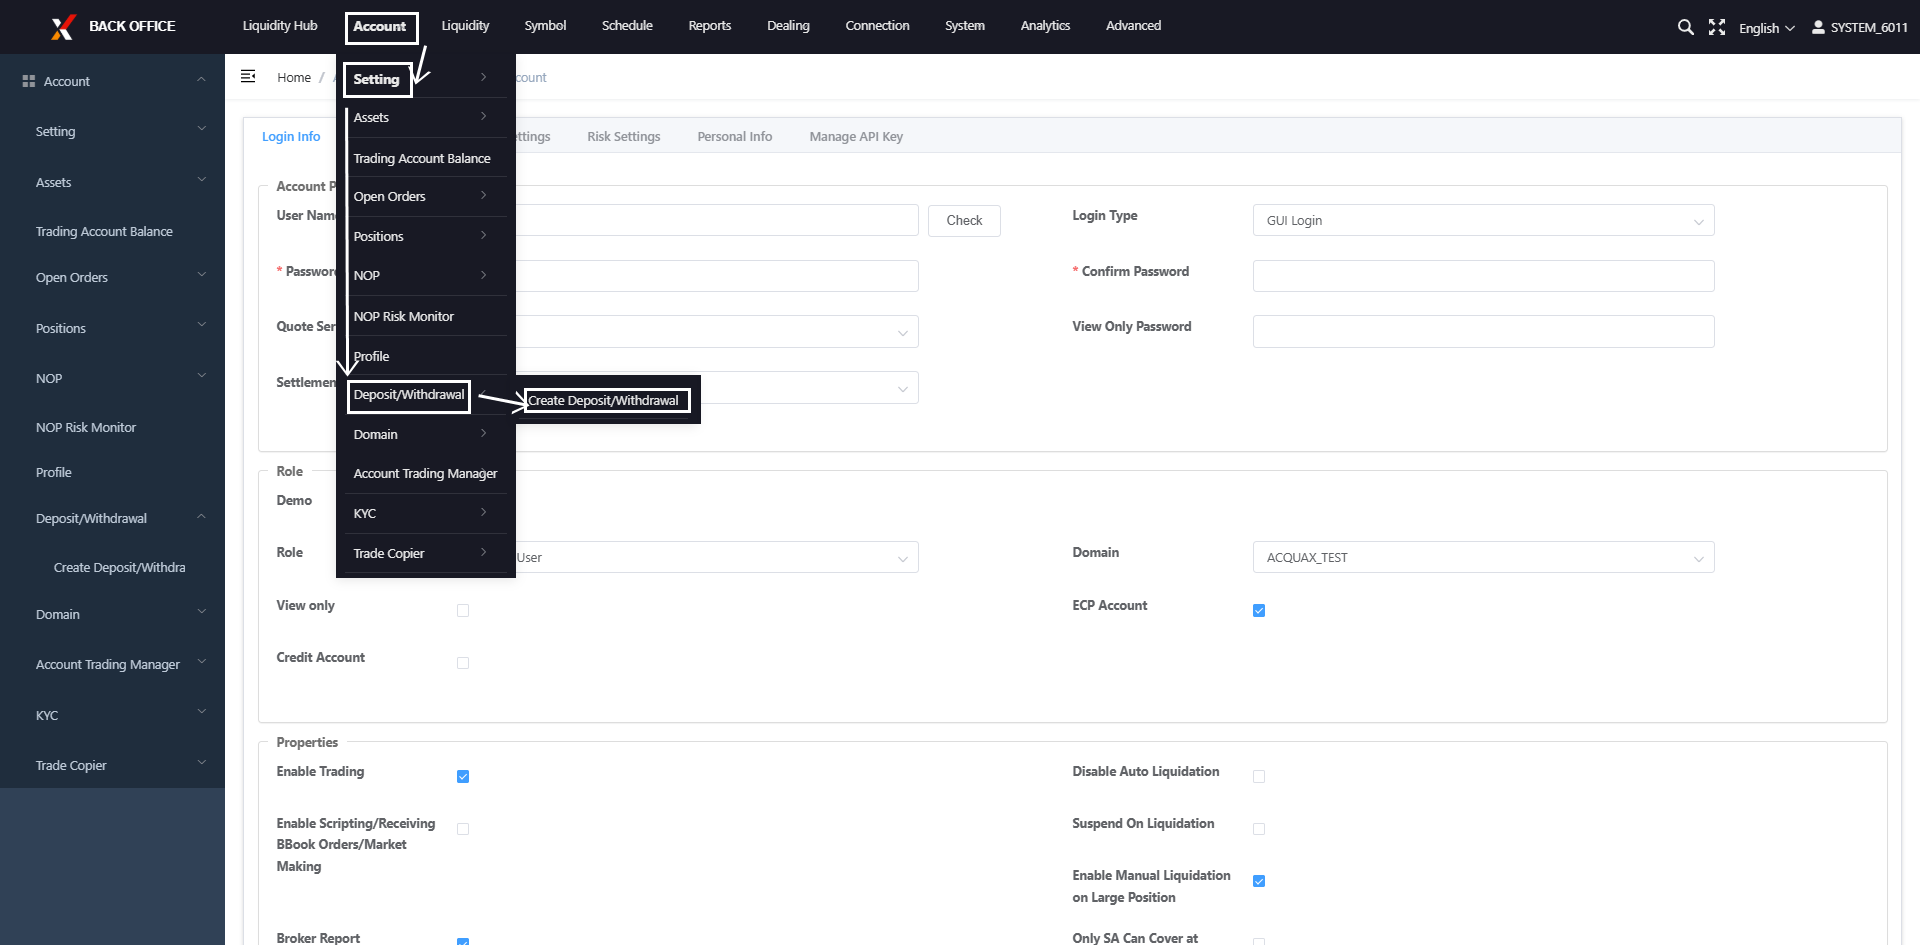
(2)Fill in all fields and click Save 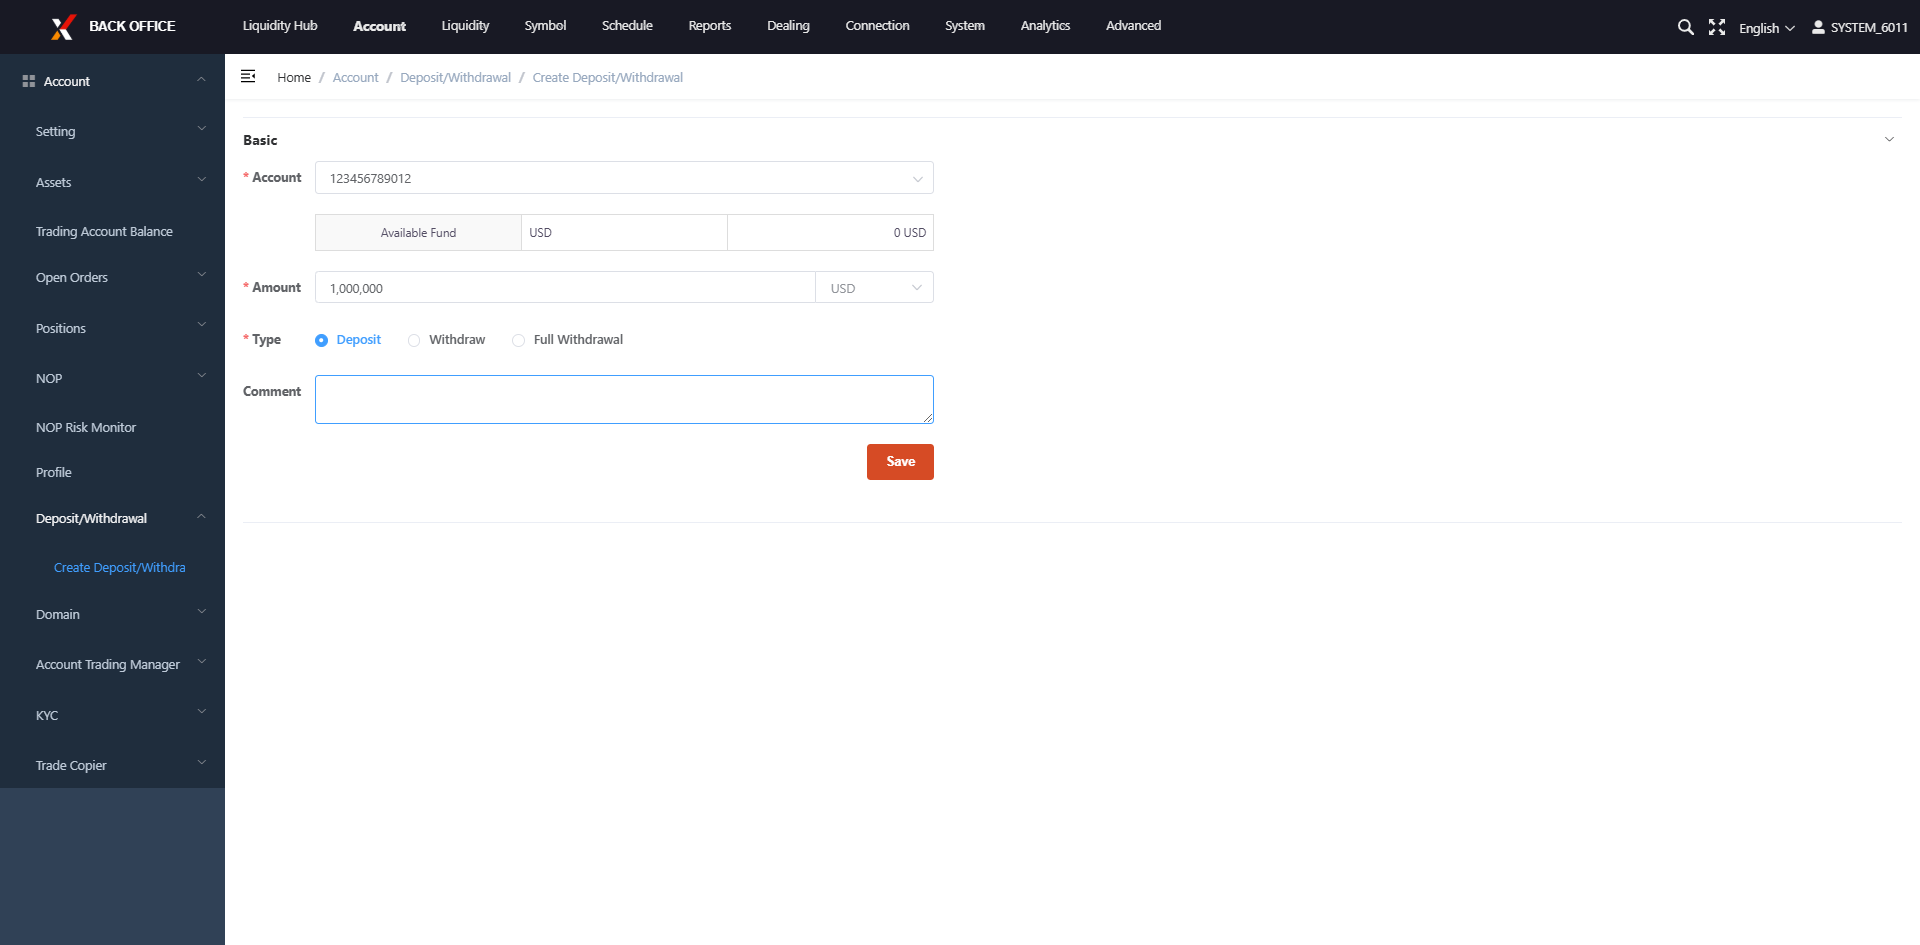
Now, you can start your trading!
Tips:
Most features support bulk creation and management. API modification is also supported.
Need Help?
Contact your account manager or email [email protected].